 Over the last year there has been a flurry of interest in my Watercolor technique with tutorials and videos by enthusiastic artists popping up in many places.
Remember playing the game of “Telephone” or “Whisper Down the Lane” and by the time the last person repeated the information it was all mixed up? That’s what happened with the sharing of this simple technique that I first developed in 1998. So when Florence Jakarta contacted me about an official tutorial I happily agreed to send her the basic steps I use. The result is up today on the French blog, Parole de Pate.
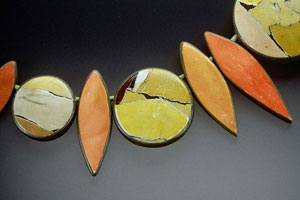
The technique of washing a thin layer of clay over white clay is a great way to “pop” the color. The addition of a black layer adds depth. There are lots of variations to play with: marbelize the colors, add inclusions, add translucent clay to the colors or as thin top layer if you want to sand after baking.
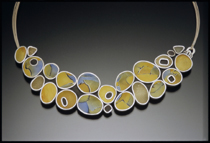
 A few years ago Judy Kuskin took a workshop and transformed the technique into gorgeous pieces by combining it with her elegant sense of style and innovative use of silver wire.
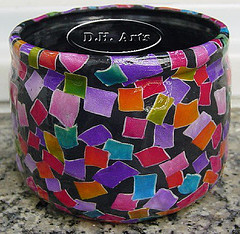
“Confetti” is the name I gave to this variation of the technique used by Diane Heller in Brazil for her beautiful bowl .
Florence has agreed to translate her tutorial into English so you can play with coming up with your own variations of the basic technique. I’ll be doing tutorials on some of my variations down the road soon, but in the meantime have fun with it. I’m looking forward to seeing where the exploration of the technique goes from here.


March 1, 2010 at 1:26 pm
It’s the coloured beads I’m most interested in. I managed to obtain the same visual effect about three years ago after having seen that picture in a book – the results were smashing even if I say so and shouldn’t. I painted on top of the white clay, see, to get that slight ‘cracked’ effect as well as the spotty look. BUT: I couldn’t polish them or cover with anything to protect the colour because the paint either washed or rubbed off.
Please, Ms. Maggio, put me out of my misery – I’ve asked everyone I can think of for a solution, no one knows. ARE those beads in the picture painted, or are they covered in coloured clay on top of the white?
I doubt you’ll reply to this but it feels better just to get a little of the frustration out there …
Yours,
Barbara Colautti
February 2, 2008 at 5:15 pm
Thank you for letting Parole de Pate write your tutorial!!!
France
August 5, 2007 at 12:28 am
Thank you so very much for this tutorial and for sharing with us all. I love your work.
February 5, 2007 at 5:46 pm
Thanks for allowing the French artist to create the tutorial of your technique. I love the beads you made with this technique and I look forward to making some of my own.
Christine
January 30, 2007 at 6:08 pm
I’m soooo glad you published this!! I tried this many moons ago when I first started in PC, and now that I have a little mileage on me (in more ways than one!), I can try again! Naturally, the first go ’round was abyssmal…
Thanks much!
Julie
January 30, 2007 at 9:51 am
here is one of the other tutorial links for this technique:
http://barbabidouille.canalblog.com/archives/2006/06/19/2123096.html
have fun
January 30, 2007 at 7:24 am
Many many many thanks for your tutorial!
I’m a fan of your creations.
You are a great artist.
Regards