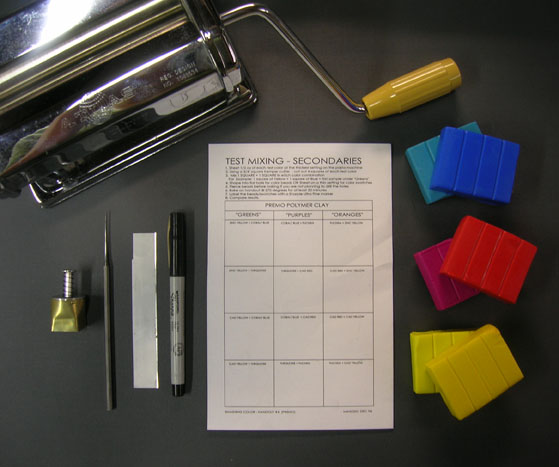
This is the first of two Studio Tool exercises in the book. We originally had more of them, including a fan deck of Skinner blends, but due to space limitations we had to cut them out. I will try to add instructions for the missing tools at the point in the book where we wanted them to be.
The Tasting Tiles are designed to be part of a reference set of color samples that you keep on hand to check when you are deciding which clays to use to make a palette.
A few years ago I posted instructions and a form for test mixing secondaries that was based on mixing all the secondaries using equal parts of the primaries. (Download PDF Test Mixing Handout (for Premo and Kato) or (for Fimo)
For the book, Lindly and I decided to use different formulas for each the secondary colors:
Violets: 1/2 blue:1/2 magenta
Greens: 3/4 yellow: 1/4 blue
Oranges: 15/16 yellow: 1/16 magenta
Muds: 1/3 yellow, 1/3 blue. 1/3 magenta
NOTE: The diagram of GREEN on the bottom page 56 is incorrect. It should show 1 part blue:3 parts yellow. (I am much more understanding of mistakes in books now that we have published ours!)
Tasting Tiles are all about undertanding hue bias, and hue bias is all about MUD. Here’s an excerpt from the same post from a few years ago about test mixing and mud:
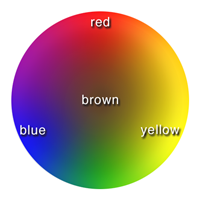
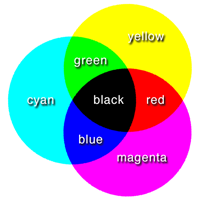
Traditional theory says R+Y+B =Black, and Modern Theory says C+M+Y=Black. Reality is Three Primaries = MUD. I define MUD as the color you get when you mix primaries in equal amounts. Depending on which primaries you pick MUD can be many colors.
Traditional MUD
If you have been mixing colors using the traditional Red, Yellow, Blue primaries then you are familiar with the reality that MUD is in the middle. MUD in the RYB system is usually closer to a brown than a gray.
Modern MUD 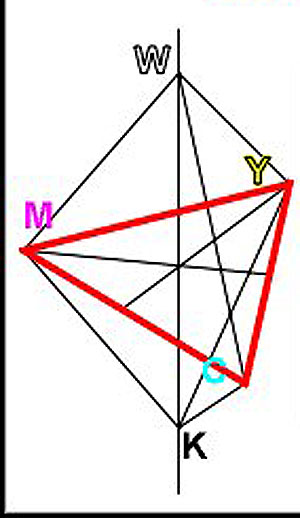
This diagram of the CMY color space shows that the mixture of C+M+Y is somewhere between black and white. MUD in the CMY system is more gray than brown. Note that this diagram is misleading because it shows the primaries all at a middle value and we know that’s not true!
Understanding Primaries Undertone/Bias
There are no perfect primaries. Each of the colors we think of as a primary leans a little (or a lot) toward one of the other primaries. This is called the color’s bias. See page 25.
When you try to mix a secondary color from two primaries you need to know how far away your primaries are from the imaginary perfect primaries. For example, Ultramarine Blue is really Cyan, or primary blue, with quite a bit of Magenta. Golden Yellow is Yellow with just a titch of Magenta.
If you mix Ultramarine Blue with Golden Yellow expecting a bright green you will be disappointed. The magenta in Ultramarine and the magenta in Cad Yellow will get together and steal an equal amount of primary blue from the Ultramarine and also grab some yellow from the Cad Yellow.
The combined B+M+Y will make a MUD that is close to gray. That gray will mix with the green to make a gray green instead of a bright green.
To successfully mix colors, the first thing you need to know is how much Blue, Magenta and Yellow are in each of the colors. One way to find this out is by mixing tasting tiles.
Time to start mixing colors! Be sure to label as you go . . .”
Weekend Extras Exercises
1. Make the tasting tiles in clays other than Premo.
2. Try using orange reds, such as Premo Cadmium Red, Fimo Soft Indian Red, or Sculpey Tomato Red instead of magenta/fuchsia/cherry red versions of the primaries.
3. Change the formulas for the secondaries based on the results you get using our consensual formulas.
4. Make a set of tasting tiles using mixed primary colors instead of primaries out of the package.
5. Customize/mix your primary colors so that you get the secondaries you like the best.
6. If you haven’t watched Beau Lotto’s TED video that Cynthia posted on Polymer Clay Daily yesterday – watch it! Its very fun and shows lots of what will be covered when we get to the chapter on “Playing Games with Color.”
TIPS
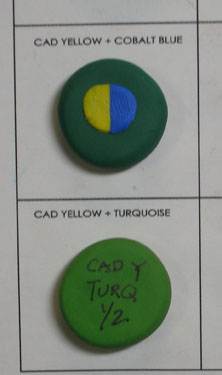
You can choose any primary from the chart on p. 138 to mix tasting tiles.
Make a chart similar to the one shown at the top of the post and label each square with the clays and formulas you are using to make the tasting tiles. Bake the samples on the chart so that you can keep track of what you are doing.
If you don’t want to make the pie chart labels you can label the tasting tiles using a Sharpie.
When tinting the center of the tasting tiles with white, try to keep the mix close to 1/2 color/1/2 white.
FAQs
1. Why are some reds in the primary section of the chart on p.138 and some reds in the secondary section?
There is so much yellow in Orange Reds that they cannot be used to mix clear violets. If you don’t mind muddy violets feel free to use orange reds as primaries.
2. Tasting tiles are a lot of work – why bother?
In the process of making them you will learn a huge amount about how colors mix, plus you will have the tiles on hand for future reference. Just do it!
Which colors have the most MUD? Which the least? Can you figure out why?


Leave a Reply